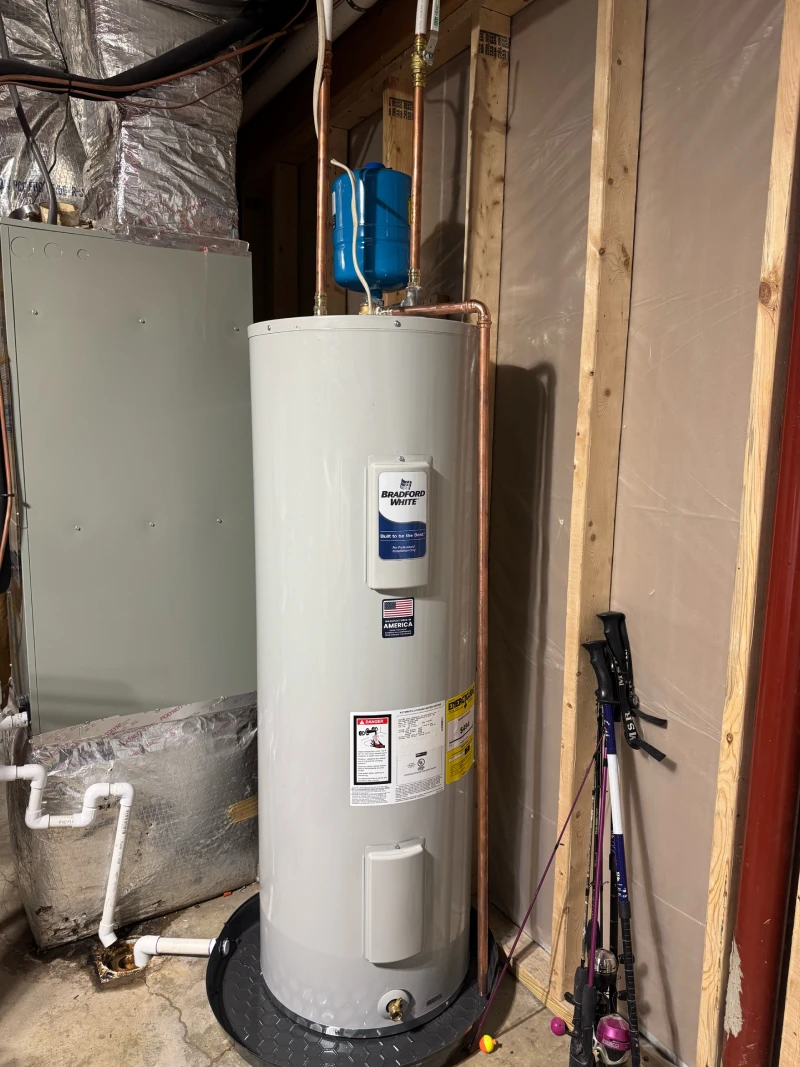
Mistake 1: Neglecting Annual Tank Flushing
One of the most damaging yet preventable mistakes homeowners make is failing to flush their water heater tank on a regular schedule. Sediment accumulation is not merely an inconvenience; it represents a progressive threat to your system’s efficiency and longevity. As water enters your tank, it carries dissolved minerals such as calcium and magnesium. When the heating element raises the water temperature, these minerals precipitate out of solution and settle at the bottom of the tank as a layer of hardened sediment.
In the Lyndhurst area, where Central Virginia’s groundwater naturally contains moderate to high mineral content, sediment buildup occurs faster than in regions with softer water. Many homeowners underestimate how quickly this layer can accumulate. Within a single year, a quarter-inch to half-inch of sediment can coat the tank floor, creating an insulating barrier between the heating element and the water. This barrier forces the element to work harder and longer to achieve the same temperature, driving up energy costs by as much as twenty percent.
Beyond efficiency losses, sediment causes direct physical damage. The constant overheating of the tank bottom weakens the steel, accelerating corrosion and eventually leading to pinhole leaks or catastrophic tank failure. The heating element itself suffers premature burnout from the added thermal stress. Additionally, sediment creates pockets where corrosion can initiate, particularly in older tanks where the protective glass lining may have minor imperfections.
Flushing your water heater annually removes this sediment before it hardens into a cement-like mass that can be nearly impossible to clear without professional water heater services. The process involves attaching a garden hose to the drain valve, opening the valve, and allowing several gallons to flow out until the water runs clear. For homeowners who have never performed this maintenance, the first flush often reveals shockingly discolored water filled with visible particles. If your system has gone several years without flushing, scheduling a professional inspection can determine whether the sediment has caused permanent damage or if the tank can be restored to proper function.
Mistake 2: Setting the Thermostat Too High
The second mistake that substantially shortens water heater lifespan is operating the system at excessively high temperatures. Many units ship from the factory with the thermostat preset to 140°F, a temperature that may seem appropriate for ensuring hot showers and effective dishwashing. However, maintaining water at this temperature creates multiple problems that compound over time, silently degrading your system’s components and increasing operational costs.
The optimal setting for most residential water heaters is 120°F. This temperature provides sufficient heat for all household needs while minimizing the accelerated corrosion that occurs at higher temperatures. When water temperature exceeds 130°F, the rate of mineral deposition increases significantly, and the chemical reactions that cause tank corrosion proceed at a faster pace. The anode rod, a sacrificial component designed to corrode in place of the tank itself, depletes much more quickly at elevated temperatures, leaving the tank vulnerable once the rod is consumed.
During Central Virginia’s summer months, when incoming water temperatures can reach 65°F to 70°F, the difference between a 120°F and 140°F setpoint may seem modest. However, over the course of a year, that twenty-degree difference translates to hundreds of additional heating cycles, each one stressing the tank and heating elements. In winter, when incoming groundwater temperatures in the Lyndhurst area drop to the low 40s, the differential becomes even more pronounced, and the energy waste grows accordingly.
Higher temperatures also present a genuine safety hazard, particularly in homes with young children or elderly residents. Water at 140°F can cause third-degree burns in as little as five seconds, while 120°F water requires two full minutes of exposure to cause similar injury. From both a safety and equipment longevity standpoint, reducing your thermostat to 120°F is one of the simplest and most effective changes you can implement. If you are uncertain about your current setting or how to adjust it safely, a qualified plumbing contractor can verify your system’s temperature and make the necessary adjustment during a routine service call.
Mistake 3: Ignoring the Pressure Relief Valve
The temperature and pressure relief valve (TPR valve) serves as your water heater’s primary safety mechanism, yet it remains one of the most overlooked components in routine maintenance. This valve is engineered to open automatically if internal tank pressure exceeds 150 psi or if water temperature surpasses 210°F, preventing a dangerous pressure buildup that could result in tank rupture. Despite its critical function, many homeowners never test this valve or verify that it operates correctly, a mistake that can have severe consequences.
A TPR valve that has sat unused for years often becomes corroded or caked with mineral deposits, rendering it inoperable. When this happens, the valve fails to open even when pressure or temperature reaches dangerous levels, eliminating the system’s built-in safety release. Conversely, a valve that has corroded in the partially open position will leak continuously, wasting water and creating the false impression that the tank itself has failed. Both scenarios require immediate attention from a qualified professional.
Testing the TPR valve is straightforward but must be performed carefully. The procedure involves lifting the valve’s test lever briefly to allow a small amount of water to discharge through the overflow pipe. If water flows freely and stops completely when you release the lever, the valve is functioning properly. If no water flows, or if water continues to drip after you release the lever, the valve has failed and must be replaced. This test should be performed at least once per year, ideally during the same maintenance visit when you flush the tank.
In the Lyndhurst region, where seasonal temperature swings place varying demands on water heating systems, a functioning TPR valve provides essential protection during peak usage periods. Winter months see increased hot water demand as families take longer showers and run dishwashers more frequently, raising both tank temperature and pressure. A malfunctioning valve during these periods represents a genuine risk. If you have never tested your TPR valve or if your system is more than five years old without documented valve maintenance, scheduling an inspection with a trusted provider of water heater services will confirm that this critical safety component is working as designed.
Mistake 4: Neglecting the Anode Rod Replacement
The anode rod is an ingenious piece of engineering that most homeowners never see and rarely think about, yet it plays the single most important role in preventing tank corrosion. This long metal rod, typically constructed from magnesium or aluminum around a steel core, is inserted into the top of the tank and designed to corrode preferentially. As long as the anode rod remains intact, the electrochemical process that causes rust attacks the rod rather than the tank walls. Once the rod is fully consumed, however, corrosion begins attacking the tank itself, and the countdown to tank failure begins in earnest.
Most manufacturers recommend inspecting the anode rod every two to three years and replacing it when more than six inches of the core wire is exposed or when the rod has deteriorated to less than half its original diameter. In practice, very few homeowners follow this schedule, and many water heaters operate for their entire lifespan without a single anode rod replacement. This oversight is one of the primary reasons that tanks fail prematurely, often within eight to ten years rather than the twelve to fifteen years they are designed to last.
Water chemistry has a profound impact on anode rod lifespan. In areas where water is particularly hard or has high mineral content, such as parts of Augusta County and surrounding areas in Central Virginia, anode rods can deteriorate in as little as two years. Homes equipped with water softeners face a different challenge: softened water is more conductive, which accelerates the electrochemical reaction and can consume an anode rod even faster. If you have recently installed a water softener installation or water conditioner installation, shortening your anode rod inspection interval to eighteen months is a prudent step.
Replacing an anode rod is not a task most homeowners can complete without assistance. The rod is threaded into the tank top and often requires significant torque to remove, particularly if it has been in place for several years. Additionally, access may be limited if the water heater is installed in a tight space with insufficient overhead clearance. A qualified plumbing contractor has the tools and experience to remove the old rod, inspect the tank interior for signs of corrosion, and install a new rod properly. If your water heater is more than three years old and the anode rod has never been inspected, scheduling this service can add years to your system’s functional life and prevent the expense and disruption of premature water heater replacement.
Mistake 5: Delaying Professional Inspections and Maintenance
The anode rod serves as your water heater’s sacrificial protector, deliberately corroding in place of the steel tank walls. When this component is allowed to deteriorate completely without replacement, the tank itself begins to rust, leading to leaks and catastrophic failure. Most manufacturers recommend anode rod inspection every three years and replacement when the rod has deteriorated to less than half an inch in diameter or when the core wire is exposed. However, the majority of homeowners in the Lyndhurst area never open their tanks to check this critical component, allowing the rod to fail completely and leaving the tank vulnerable.
Water chemistry plays a decisive role in anode rod longevity. In Central Virginia, where hard water is prevalent in many wells and municipal supplies, magnesium anode rods can deteriorate at an accelerated rate due to elevated mineral content. Homes equipped with water softeners present a different challenge: softened water, while beneficial for plumbing fixtures and appliances, can actually consume anode rods more quickly due to the ion exchange process that replaces calcium and magnesium with sodium. If your home uses a water conditioning service or water softener system, annual anode rod inspections become even more critical to prevent premature tank failure.
Replacing an anode rod is a straightforward preventive measure that dramatically extends tank life, often adding five to ten years of service. The procedure requires draining a few gallons from the tank, locating the hex head at the top of the unit, and using a breaker bar or impact wrench to remove the old rod. Some tanks feature combination anode rods built into the hot water outlet, which require a different replacement approach. If you encounter resistance or lack the proper tools, attempting to force the rod can damage tank threads and create leak points. Professional water heater services include anode rod inspection and replacement as part of comprehensive maintenance, ensuring the job is completed correctly without risking damage to your system. Ignoring this inexpensive component is one of the most costly mistakes a homeowner can make, as a $30 part can prevent a $1,500 tank replacement.